Engine lathes have remained the backbone of metalworking shops, educational institutions, and hobbyist spaces for over a century – and for good reason. These precision tools deliver versatility, durability, and repeatability that newer technologies have yet to fully replicate. Whether you’re restoring a vintage part, prototyping a custom shaft, or teaching the fundamentals of machining, an engine lathe gives you hands-on control and immediate feedback that builds real craftsmanship.
This comprehensive guide walks you through everything you need to know to choose, operate, and maintain an engine lathe that fits your specific application. You’ll learn how to interpret critical specifications, compare models across budget ranges, inspect used machines, and execute common projects with confidence.
Top Picks by Use-Case:
- Hobby benchtop: Grizzly G0619 (7×16 mini lathe, ~$2,000–$2,500)
- Mid-range shop: Southbend 10K or Clausing Colchester (10–12″ swing, ~$8,000–$15,000 used)
- Heavy-duty industrial: South Bend Heavy 10 or similar production-grade center lathe (16–20″ swing, $15,000+)
Who This Guide Is For
This resource serves four distinct audiences, each with unique priorities:
- Hobbyists & makers: Seeking precision and versatility in a compact, affordable package for weekend projects and learning.
- Small machine shops & prototypers: Needing flexible production capacity, multi-purpose capability, and quick setup for job-shop work.
- Restoration & industrial maintenance teams: Restoring vintage equipment or manufacturing bespoke replacement parts on tight deadlines.
- Educators & vocational programs: Teaching practical machining fundamentals, tool operation, and real-world problem-solving in cost-effective, durable platforms.
Engine Lathe Basics – What It Is & How It Works
Definition & Quick Comparison
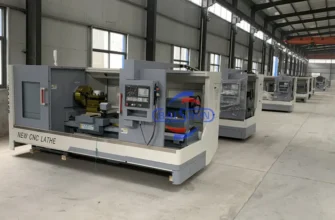
An engine lathe (also called a center lathe or conventional lathe) is a manually controlled machine tool that rotates a workpiece against a cutting tool to produce cylindrical or tapered parts. Unlike CNC lathes (which use computerized control), engine lathes rely on operator skill and mechanical gearboxes. They differ from turret lathes (which hold multiple tools on a turret for faster repetitive production) in that they feature a single toolpost requiring manual tool changes.
Quick Comparison:
| Feature | Engine Lathe | CNC Lathe | Turret Lathe |
|---|---|---|---|
| Skill Required | High | Low–Medium | Medium |
| Setup Time | Quick | Longer (programming) | Longer (turret setup) |
| Unit Cost | $2K–$50K+ | $20K–$200K+ | $15K–$100K+ |
| Best For | Job-shop, prototyping, learning | High-volume production | Medium-volume, complex parts |
| Operator Feedback | Direct, immediate | Monitoring display | Turret indexing |
Main Components & How They Work
Understanding the anatomy of an engine lathe helps you interpret specifications and troubleshoot problems:
- Bed: The rigid cast-iron foundation that keeps all parts aligned. Quality beds resist vibration and maintain precision over time.
- Headstock: Houses the main spindle, pulley system, and gearbox. Rotation speed is controlled here via belt position or gearbox settings.
- Spindle: The rotating shaft that grips and spins the workpiece. Available in various tapers (MT2, MT3, MT5, D1-4) for different accessories.
- Chuck: Mechanical clamping device (typically 3-jaw or 4-jaw) that holds round stock or irregular workpieces.
- Tailstock: Movable support at the opposite end of the bed, holding a live center or drill chuck for longer workpieces.
- Carriage: Slides along the bed and carries the toolpost and cutting tool. Manual or power feed controls its horizontal movement.
- Lead screw & feed rod: Mechanical shafts that translate spindle rotation into linear carriage motion for feeds and threading.
- Cross-slide: The perpendicular adjustment that moves the cutting tool toward or away from the spinning workpiece (depth of cut).
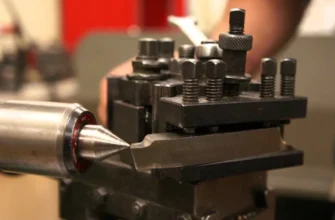
- Toolpost: Holds and positions the cutting tool. Common types include fixed, rocker, and quick-change designs.
Basic Operations
- Turning: Removing material from the outer diameter of a rotating workpiece.
- Facing: Cutting a flat perpendicular surface at the end of a part.
- Boring: Enlarging an existing hole or internal feature.
- Threading: Cutting helical threads (metric or imperial) using the lead screw.
- Knurling: Creating a textured pattern for grip or aesthetic purposes.
- Taper turning: Creating conical or sloped features using the tailstock offset or compound slide.
Essential Glossary of Terms
- Chuck types: 3-jaw (quick grip, auto-centering), 4-jaw (manual, flexible), collet (precise, fast for repetitive work)
- Spindle bore: The hollow hole through the spindle; larger bores accept bigger bar stock without center support
- TPI (threads per inch): Standard measure of thread density in imperial systems; metric equivalents use pitch (e.g., 1.5 mm)
- Spindle taper: The conical connection for attaching centers, drills, and chucks (MT = Morse taper; D1 = cam-lock; common sizes: MT2, MT3, MT5, D1-4)
- Swing over bed: The maximum diameter of workpiece that can rotate without hitting the bed
- Distance between centers (DBC): The maximum length of a part that can be supported between headstock and tailstock
- Runout: Wobble or eccentricity in the spinning workpiece or spindle; measured in thousandths of an inch (TIR = total indicated runout)
Key Specs That Matter – A Deep Dive
Selecting an engine lathe means understanding the specifications that determine what you can build and how accurately you can build it. Here are the critical parameters:
Swing Over Bed
What it is: The maximum diameter of a cylindrical workpiece that can rotate without striking the lathe bed.
Why it matters: Directly limits the size of parts you can produce. A 10″ swing means you can work with up to a 10″ diameter round stock (mounted in a chuck at the headstock).
How to calculate: Diameter = 2 × (distance from spindle centerline to bed top edge)
Practical interpretation:
- 6–8″ swing: small benchtop hobby work, tool handles, small shafts
- 9–12″ swing: general-purpose job-shop work, most common educational use
- 13–16″ swing: larger shafts, heavier production runs
- 18″+: heavy industrial, large diameter work
Distance Between Centers (DBC)
What it is: The maximum length of a workpiece that can be supported between the headstock spindle nose and the tailstock center.
Why it matters: Determines maximum part length. Longer DBC allows slender parts with less vibration and chatter.
Common ratios: Most lathes have DBC roughly 1.5–2 times their swing. A 10×20 lathe means 10″ swing and ~20″ distance between centers.
Real-world implication: A 10×20 lathe can produce a part up to 20″ long and 10″ in diameter (if supported throughout).
Spindle Bore & Taper
Spindle bore: The internal hole through the spindle that accepts bar stock without tail support. Larger bores (5/8″, 3/4″, 1″) are convenient for rapid setup but not all machines offer them.
Spindle taper: The mechanical connection for chucks, centers, and drilling tools.
- Morse taper (MT): Most common on smaller machines (MT2, MT3, MT5); self-holding but requires drawing force to remove
- D1 cam-lock: Industrial standard on larger machines; quick-change but less holding power
- R8, R16: Precision tooling tapers for small production lathes
Compatibility matters: Verify that the spindle taper matches available tooling and accessories you plan to use.
Spindle Speed Range & Speed Control
RPM range: How fast the spindle can rotate, typically from 30–50 RPM (minimum for large diameter facing) to 1,000–3,000 RPM (maximum for small diameter turning).
Speed control methods:
- Stepped headstock with V-belts: Manual belt shifting; reliable, simple, low cost. Speed changes require stopping and repositioning belts.
- Variable frequency drive (VFD): Electronic control allowing infinite speed adjustment without stopping. Modern upgrades for older machines; adds $1,500–$3,000.
- Mechanical gearbox: Internal sliding gears for discrete speed steps; more sophisticated but requires more maintenance.
Recommended speeds by material & operation:
- Steel (turning): 40–80 SFM (surface feet per minute) → RPM = (SFM × 12) / (π × diameter)
- Aluminum (turning): 100–200 SFM
- Facing: 30–50 SFM
- Threading: 20–40 SFM (slower for precision)
Horsepower & Motor Type
Continuous vs. peak rating: Continuous horsepower reflects sustained power; peak or intermittent ratings may be higher but unreliable for steady work.
Single-phase vs. three-phase: Most hobbyist and small shop lathes use single-phase (standard 230V residential). Industrial lathes use three-phase (208V, 230V, 460V) for efficiency and power. Inverters can convert single-phase to three-phase for ~$800–$1,500 if needed.
Practical power requirements:
- Benchtop/mini lathes: 0.5–1 HP (adequate for aluminum, small steel work)
- Mid-size center lathes: 1.5–3 HP (versatile for steel, good feed rates)
- Heavy-duty production lathes: 5–10+ HP (high material removal rates, continuous duty)
Threading Capabilities
Metric & imperial: Many lathes accommodate both through changeable gears or a metric/imperial gearbox.
Gear ratios: Determines available thread pitches. A lathe with a wide range of change gears can cut almost any standard thread with the right combination.
Screw-cutting gearbox: Built-in system reduces changeover time; a lathe with 100+ thread options may save hours monthly in a production setting.
Bed Construction & Rigidity
Cast-iron vs. welded: Cast-iron beds dampen vibration better and maintain precision longer; welded beds are lighter and less costly but more prone to deflection and chatter.
V-ways vs. flat ways: V-shaped bearing surfaces provide better alignment and faster ways scraping during maintenance. Flat ways are simpler but require more careful leveling.
Rigidity impacts: A rigid bed reduces tool chatter, improves surface finish, allows faster feeds, and extends tool life. Felt in immediate improvement when cutting aluminum or working at higher speeds.
Precision & Tolerances
Spindle runout: Measured in TIR (total indicated runout); critical specs:
- Hobby-grade: ±0.005″ (acceptable for general work)
- Precision/toolroom: ±0.0005″ (for fine tolerances)
Achievable surface finish: Depends on lathe rigidity, tool quality, and speed/feed selection. Expect:
- 63–125 µin Ra (rough turning)
- 32–63 µin Ra (moderate finishing)
- 8–16 µin Ra (fine finishing with carbide and precision setup)
Thread fit quality: Determines if threads mate properly. A well-tuned lathe with precision tools achieves Class 2 or Class 3 fits routinely.
Accessories & Tooling
Standard tooling includes:
- 3-jaw chuck (auto-centering, fast setup)
- Tailstock with live center
- Fixed or rocker toolpost
- Lead screw and feed rod (for manual or power feeds)
Common accessories to budget for:
- 4-jaw chuck ($200–$600): independent control, higher precision
- Collet chuck set ($150–$400): rapid changeover for repeated setups
- Steady rest ($300–$800): supports long, slender parts
- Follow rest ($200–$600): prevents deflection during heavy cuts
- Quick-change toolpost ($200–$500): faster tool changes, repeatable positions
Specification Checklist: Minimum Acceptable Specs by Use Case
| Use Case | Swing | DBC | Motor HP | Speed Range | Spindle Bore | Budget |
|---|---|---|---|---|---|---|
| Hobby | 6–8″ | 12–16″ | 0.5–1 | 100–2000 RPM | 1/2″+ | $1,500–$3,000 |
| Small shop | 10–12″ | 18–24″ | 1.5–2 | 50–2000 RPM | 5/8″+ | $5,000–$12,000 |
| Production | 14–16″ | 24–36″ | 3–5 | 20–1500 RPM | 3/4″+ | $12,000–$40,000 |
| Precision toolroom | 8–12″ | 16–24″ | 2–3 | 50–3000 RPM | 5/8″+ | $8,000–$30,000 |
Types of Engine Lathes – Which Style Fits Your Needs
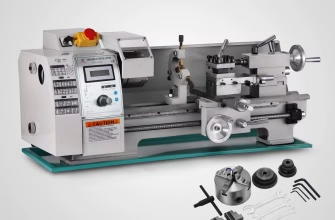
Benchtop & Mini Lathes
Profile: Compact machines (6–8″ swing, often 12–16″ DBC) designed to sit on a workbench or stand. Single-phase powered, usually 0.5–1 HP.
Ideal for: Hobbyists, makers, educational demos, prototype work on small parts.
Strengths: Affordable, quiet, fast setup, minimal floor space, quick projects.
Limitations: Light-duty only; limited threading capacity on some models; limited speed options on budget versions.
Representative models: Sherline, Grizzly G0619, Harbor Freight, Taig.
Gap-Bed Lathes
Profile: Removable section of bed between headstock and carriage, allowing larger diameter workpieces to be mounted at the headstock or fed over the lowered section.
Ideal for: Facing large flanges, working with wide parts, large-diameter facing operations.
Strengths: Increased flexibility in workholding, capability for larger diameter work.
Limitations: More complex setup; less rigid in the gap region; requires careful positioning.
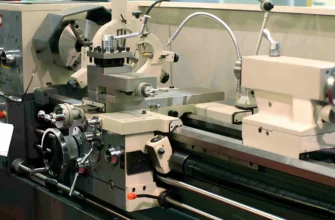
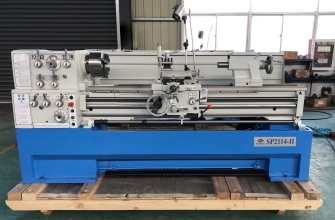
Center Lathes (Standard Engine Lathes)
Profile: Most common type; 10–14″ swing typical in hobby/small shop; 16–24″ in industrial settings. Continuous beds from headstock to tailstock.
Ideal for: General-purpose work, job-shop operations, educational use, restoration projects, versatile production runs.
Strengths: Proven reliability, extensive tooling ecosystem, simple operation, well-documented procedures, good resale value.
Limitations: Limited to swing diameter; longer parts require creative support methods.
Representative models: Southbend 10L, Clausing Colchester, Logan, Sheldon.
Toolroom & Precision Lathes
Profile: Built for tight tolerances and finish quality; MT3/MT5 spindle tapers; V-ways; precision ground bed; often include quick-change toolpost and more speed options (50–3,000+ RPM).
Ideal for: Precision mechanical work, tool & die, instrument manufacturing, research & development, prototype tooling.
Strengths: Superior accuracy, excellent finish capability, fast changeovers, repeatable setups.
Limitations: Higher cost ($8,000–$30,000+); requires skilled setup and operation; potentially overkill for casual hobbyists.
Representative models: Hardinge, Schaublin, Emco.
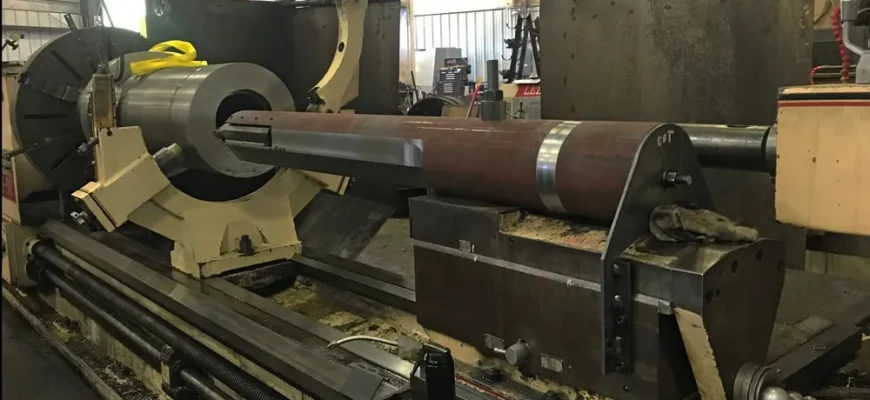
Heavy-Duty Industrial/Production Lathes
Profile: 16–24″+ swing; three-phase motors (5–15 HP); power feed systems; rigid cast-iron construction; often equipped with electronic or hydraulic chuck actuation.
Ideal for: High-volume production, long-running jobs, heavy material removal, industrial maintenance.
Strengths: Unstoppable performance, handles continuous duty cycles, accommodates large workpieces and heavy feeds, long tool life.
Limitations: High floor space, three-phase power requirement (often necessitating electrical upgrades), significant setup time, best suited for dedicated work.
Representative models: Southbend Heavy 10/16, LeBlond, Monarch, Cincinnati.
Manual vs. Industrial – What the Difference Really Is
While both are engine lathes, the distinction between manual hobby/shop machines and industrial lathes affects how you work, what you pay, and long-term satisfaction.
Build & Tolerances
Manual machines are built to consistent specifications but with tolerances ±0.002–±0.005″ in their core geometry. A 10″ swing is often a 10″ swing; achieved through careful manufacturing but accepted within normal limits.
Industrial machines maintain tighter tolerances (±0.0005–±0.001″) through precision casting, secondary grinding, and rigorous inspection. They’re designed to maintain accuracy over millions of cycles.
Impact on your work: Manual machines produce excellent work for 90% of jobs; industrial machines excel when you need ±0.001″ repeatability or run 16-hour production days without drift.
Controls & Power
Manual machines:
- Stepped spindle speeds via belt shifts or gear levers
- Mechanical feed via hand wheels and lead screw
- Operator manually calculates RPM and sets up each change
Industrial machines:
- Electronic or programmable speed control
- Power feeds with selectable speeds and automatic reversal (threading)
- Quick-change or turret tooling for rapid setups
- Often include tailstock auto-feed, cross-slide auto-stop
Practical difference: A manual lathe threading a 1–2″ part takes ~5–10 minutes setup plus cutting. An industrial lathe with power feed and quick-change tooling cuts the same part in half the time, leaving operator free for other tasks.
Cost-to-Value & Total Cost of Ownership
| Dimension | Manual | Industrial |
|---|---|---|
| Initial purchase | $3K–$15K | $15K–$60K+ |
| Floor space | 8×12 ft | 12×16 ft+ |
| Electrical requirement | 230V single-phase | 460V three-phase (often) |
| Maintenance per year | $200–$500 | $500–$1,500 |
| Tool life per part | Good | Excellent (higher feeds) |
| Operator skill required | High | Medium–High |
| Resale value (5 yr) | 60–70% original | 50–60% original |
TCO reality: An industrial lathe running 40 hrs/week may produce parts at $0.50 less per unit than a manual machine due to faster cycles and less operator attention. If you’re running 100 parts/month at $5 labor savings each, that’s $6,000/year – justifying the higher capital outlay.
Use-Case Decision Matrix
| Application | Machine Type | Rationale |
|---|---|---|
| Weekend hobby projects | Benchtop mini (6–8″) | Low cost, minimal space, adequate for small parts |
| Learning metalworking | Standard center lathe (10–12″) | Versatile, forgiving, excellent pedagogy |
| Small machine shop (job work) | Manual center lathe (12–14″) | Flexibility, quick setups, suits varied work |
| Production runs (50–200 parts/mo) | Industrial center lathe (16″+) | ROI justified by cycle time savings |
| Precision/tool-room work | Precision toolroom lathe (8–12″) | Accuracy, finish quality, quick changeovers |
| Heavy restorations | Industrial heavy-duty lathe (16–20″+) | Capacity for large diameter, rigid enough for heavy cuts |
Top-Rated Models & Recommended Picks
Below are representative recommendations across budget and use-case categories. Specifications and availability change; verify current pricing and availability with dealers.
Best Benchtop / Hobby Pick: Grizzly G0619
Summary: Compact 7×16 mini lathe; single-phase; 1 HP motor; ideal first lathe for hobbyists learning the fundamentals.
Standout specs:
- 7″ swing over bed, 16″ distance between centers
- 50–2,000 RPM spindle speed (8 selectable speeds via belt shifts)
- MT2 spindle and tailstock taper
- 3-jaw chuck included
- Weighs ~900 lbs (fits most workbenches with reinforcement)
Ideal user: Hobbyists, makers, students; low-budget entry into lathe work.
Pros:
- Affordable (~$2,000–$2,500)
- Quiet operation, minimal vibration
- Good online community and parts availability
- Quick setup, minimal maintenance
- 110V plug-and-play
Cons:
- Small swing limits part diameter; threading capacity limited by gearbox
- Slower material removal (light-duty only)
- Used availability unpredictable
Estimated price range: $2,000–$2,500 new; $1,200–$1,800 used.
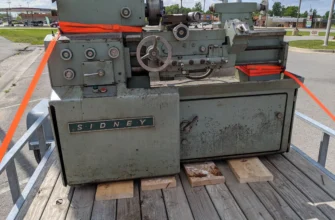
Best Budget Full-Size Lathe: Used Southbend 9A or 10L
Summary: Ubiquitous American manual center lathes; millions produced; excellent used availability; ideal for small shops on budget.
Standout specs:
- 9″ or 10″ swing; 16–20″ distance between centers
- MT2 spindle and tailstock
- 32–1,800 RPM (Southbend 10L typical range)
- 1.5 HP motor (single or three-phase options)
- Mechanical threading with change gears; metric/imperial capable
- Rock-solid bed; cast-iron construction
Ideal user: Small shop owners, restoration enthusiasts, educators looking for proven, repairable machines.
Pros:
- Excellent used market; $3,000–$7,000 for a good machine
- Millions of replacement parts and accessories available
- Proven track record; many lathes still running after 60+ years
- Operator-friendly manual controls
- Strong resale value
Cons:
- Older machines may have spindle wear or backlash issues
- Slower spindle speeds (may require VFD upgrade for high-speed work)
- Single-phase availability sometimes hard to find
- Requires inspection and possible refurbishment
Estimated price range: $3,000–$7,000 used (good condition); $7,000–$12,000 refurbished.
Best Mid-Range Shop Lathe: Clausing Colchester Student Lathe or Similar
Summary: Compact British center lathe; 13″ swing, 24″ DBC typical; excellent build quality; common in educational and small shop settings.
Standout specs:
- 13″ swing over bed, 24″ distance between centers
- MT3 spindle and tailstock
- 20–1,600 RPM (typical; mechanical headstock)
- 2 HP three-phase motor (single-phase conversions available)
- Quick-change toolpost compatible
- Metric and imperial threading via gearbox
Ideal user: Small machine shops, vocational programs, professional hobbyists seeking mid-range versatility.
Pros:
- Proven educational tool; decades of use in schools
- Compact enough to fit a small shop; powerful enough for serious work
- Excellent spindle bearings and rigidity
- Parts ecosystem well-established
Cons:
- Often requires three-phase power or costly phase conversion
- Used machines commonly in demand; pricing competitive
- May need spindle bearing attention after 40+ years
Estimated price range: $6,000–$12,000 used; $12,000–$20,000 restored/retrofitted.
Best Precision / Toolroom Lathe: Hardinge DSM-59
Summary: Swiss-made precision bench lathe; 6″ swing, 18″ DBC; MT5 spindle; designed for ultra-precise work and production repeatability.
Standout specs:
- 6″ swing, 18″ distance between centers
- 50–4,000 RPM spindle (electronic or belt options)
- MT5 spindle taper; precision ground bed
- V-ways with hardened, ground surfaces
- Integrated quick-change toolpost
- Extreme runout precision (±0.0001″ typical)
Ideal user: Tool & die shops, precision instrument makers, research labs, advanced hobbyists with exacting standards.
Pros:
- Superior precision and repeatability
- Excellent spindle; low runout throughout RPM range
- Intuitive ergonomic controls
- Quick tool changeovers; repeatable positions
- Smaller footprint than industrial machines; lower power draw
Cons:
- High cost ($15,000–$30,000+ used; new models far more)
- Overkill for casual hobbyists
- Requires skill to set up and operate effectively
- Maintenance must be precise
Estimated price range: $12,000–$28,000 used; $40,000+ new.
Best Heavy-Duty Industrial Lathe: Southbend Heavy 10 or LeBlond
Summary: American workhorse; 16″ swing, 36″ DBC typical; three-phase power; production-ready; unmatched durability.
Standout specs:
- 16″ swing over bed, 36″ distance between centers
- D1-4 cam-lock spindle
- 10–1,250 RPM spindle speed
- 5 HP three-phase motor (standard)
- Power cross-feed and power longitudinal feed
- Automatic threading with quick-reverse
- Mechanical gearbox; metric and imperial
Ideal user: Production shops, heavy restoration work, industrial maintenance, contract manufacturers.
Pros:
- Unstoppable reliability; many machines running 24/7 for decades
- Handles heavy material removal and continuous duty
- Accommodates large workpieces and long parts
- Power feeds allow operator to focus on monitoring and setup
- Excellent resale value for commercial machines
Cons:
- Requires 460V three-phase power (significant install cost)
- Large footprint (12×16 ft+ with space around)
- High maintenance demands; regular bearing checks essential
- Heavy (5,000+ lbs); requires professional moving
Estimated price range: $10,000–$25,000 used (good condition); $25,000–$50,000 fully refurbished & warranted.
Best for Restoration & Vintage Parts: Southbend 9C or Logan 2600
Summary: American standard center lathes; ubiquitous in vintage restoration shops; parts ecosystem unmatched.
Standout specs:
- 9″ or 10″ swing; 16–20″ DBC
- MT2 spindle and tailstock
- 32–1,600+ RPM (depending on model and mods)
- 1–1.5 HP motor
- Proven track record in restoration environments
Ideal user: Vintage machinery restoration, automotive restoration, gun smithing, makers replicating historical artifacts.
Pros:
- Cheap to buy ($2,000–$5,000 used)
- Exceptional parts support; even 70-year-old models have accessories available
- Right-size for small restoration jobs
- Community and documentation abundant online
Cons:
- Older machines often worn; spindle/tailstock concentricity may drift
- Slower spindle speeds (often require upgrades for modern production work)
- Backlash in older machines acceptable for restoration but not precision
Estimated price range: $2,000–$6,000 used; $4,000–$8,000 with recent overhaul.
Best Value for Educational Programs: Clausing or Southwestern Industries Student Lathes
Summary: Purpose-built for classroom use; durable, forgiving, affordable; focus on safe operation and consistent performance.
Standout specs:
- 10–13″ swing; 18–24″ DBC
- MT2 or MT3 spindle
- 30–1,600 RPM with manual speed selection
- 1–2 HP motor (single or three-phase)
- Integrated guards and interlocks
- Simplified controls; easy troubleshooting
Ideal user: Trade schools, vocational programs, community colleges, STEM/maker programs.
Pros:
- Designed for repeated instruction and student use
- Simple controls reduce learning curve
- Built for reliability and easy maintenance
- Accessories widely available and standardized
- Institutional support and spare parts availability
Cons:
- Not optimized for high-volume production
- Slower material removal rates
- Limited customization compared to industrial machines
Estimated price range: $5,000–$10,000 new; $2,000–$6,000 used.
Compact Specification Comparison Table
| Model | Swing | DBC | Motor (HP) | Speed Range (RPM) | Spindle Taper | Estimated Price |
|---|---|---|---|---|---|---|
| Grizzly G0619 | 7″ | 16″ | 1 | 50–2,000 | MT2 | $2,000–$2,500 |
| Southbend 10L | 10″ | 20″ | 1.5 | 30–1,800 | MT2 | $4,000–$8,000 |
| Clausing Colchester | 13″ | 24″ | 2 | 20–1,600 | MT3 | $6,000–$12,000 |
| Hardinge DSM-59 | 6″ | 18″ | 1.5 | 50–4,000 | MT5 | $15,000–$28,000 |
| Southbend Heavy 10 | 16″ | 36″ | 5 | 10–1,250 | D1-4 | $12,000–$25,000 |
How to Evaluate Used Engine Lathes – Inspection Checklist
Used lathes offer excellent value but require careful inspection. A worn spindle, sloppy gears, or bed damage can sink a budget months after purchase.
Visual Inspection & Setup Assessment
Bed condition:
- Look for parallel grooves worn into the ways, especially near the headstock and mid-bed where most work occurs.
- Check flatness using a straightedge or indicator; expect some wear, but ±0.005–0.010″ over 20″ is acceptable for hobby use.
- Run your hand along the ways; feel for rough spots or chipped surfaces.
- Red flag: Cracks, deep gouges, or non-metallic deposits (paint, epoxy repairs) masking damage.
Carriage & gearbox:
- Grasp the carriage and try rocking it side-to-side; significant play indicates worn gibs (slides) or ways.
- Listen for grinding or rough texture when hand-turning the lead screw; smooth, consistent resistance is ideal.
- Test all feed selections (if mechanical gearbox); each position should have firm engagement without grinding.
Spindle condition:
- Visually inspect spindle nose and taper (MT2, MT3, D1-4); no fretting, rust, or scoring.
- If possible, gently rotate the spindle by hand (with power off); listen for bearing noise (grinding = worn bearings).
- Check spindle runout by mounting a test bar and spinning; observe any wobble. A test dial indicator at 1″ runout should show <0.003″ TIR for a worn but acceptable lathe; <0.001″ for a good machine.
Chuck assessment:
- Mount a test bar in the chuck and check for wobble or slop.
- Rotate the chuck by hand; jaws should index smoothly.
- Inspect jaw surfaces for damage or wear that prevents tight clamping.
Motor & electrical:
- Check that the motor spins freely (no grinding or rubbing).
- Verify control switches are responsive and hold settings.
- For three-phase motors, confirm voltage nameplate matches available supply or confirm customer’s plan for phase conversion.
Test Cuts & Operator Trials
Request the owner perform:
- A light roughing cut on aluminum (e.g., 0.050″ depth at 500 RPM) and assess surface finish quality and vibration level.
- Threading operation (if the machine has change gears) to verify gearbox function and feed smoothness.
- A facing cut on a 2–3″ diameter workpiece to check spindle runout and carriage stability.
What to listen for:
- Smooth, consistent humming from the motor (normal).
- Grinding, squealing, or loud chattering (potentially serious).
- Grinding in the headstock region (worn bearings).
What to watch:
- Tool marks on the test cut should be smooth, not chattered or erratic.
- Surface finish should be consistent across the cut (no wavy patterns).
- Carriage should move smoothly without sudden stops or jerks.
Red Flags That Make a Used Lathe Risky
- Spindle runout >0.005″ TIR: Indicates worn bearings; replacement costs $1,500–$3,000.
- Deep bed wear: Carriage rocks or catches; refurbishment by way scraping may exceed machine value.
- Damaged gearbox or missing gears: Verify all speed/threading options work; gearbox repair $1,000–$2,500.
- Motor does not start or hums without running: Electrical failure; may indicate internal winding damage.
- Cracked bed: Unsafe and likely cannot be welded effectively; avoid.
- Heavy corrosion, rust, or pitting on surfaces: Indicates poor storage; inspect spindle bore and taper carefully; may require extensive cleaning.
- Missing or damaged chuck: 3-jaw chuck replacement ~$500–$800; 4-jaw ~$600–$1,000.
- No documentation or maintenance history: Unknown usage patterns; unknown refurbishment status; higher risk.
Typical Refurbishment Costs & ROI Considerations
| Service | Cost Range | ROI Consideration |
|---|---|---|
| Complete spindle bearing overhaul | $1,500–$3,000 | Extends machine life 10–15 yrs; essential for production use |
| Way scraping & bed restoration | $2,000–$5,000 | Improves precision ±0.002–0.003″; worth it for precision work |
| Paint & cosmetic restoration | $300–$800 | Minimal functional ROI; largely aesthetic |
| Motor rewinding or replacement | $500–$1,500 | Necessary if motor inoperative; standard electrical repair |
| Gearbox repair or component replacement | $1,000–$2,500 | Critical for threading/speed options; high ROI for production |
| Precision grinding of spindle nose | $800–$1,500 | Restores accuracy; worthwhile for precision tooling |
| Total typical overhaul | $4,000–$10,000+ | Budget before purchase; may affect true value |
Key insight: If a used lathe costs $5,000 but needs $8,000 in refurbishment, the true cost is $13,000. Compare to a newer used machine in good condition or a certified refurbished model.
Essential Accessories & Tooling to Buy With Your Lathe
Workholding & Chucking
3-jaw chuck (typically included): Quick clamping for round stock; auto-centering. Limited precision; independent jaw adjustment not possible.
- Cost: $0 (usually included); replacement $400–$800
- When to add: Always have a spare or backup; wear is inevitable.
4-jaw chuck (independent jaws): Manual independent control; centers irregular workpieces; holds square stock; extremely versatile. Requires practice to center quickly.
- Cost: $600–$1,200
- ROI: High if doing varied work; essential for restoration projects; saves hours on custom fixturing.
Collet chuck set (5C or ER collets): Precision clamping for small diameter work; repeatability within 0.0001″; rapid changeover. Requires size-specific collets.
- Cost: Collet chuck $200–$400; collet sets $150–$300
- ROI: Excellent for job-shop work, production runs, or repeated setups on similar sized parts.
Dead center & live centers (MT2, MT3, MT5 per machine): Support workpieces between headstock and tailstock. Live centers (ball bearing) reduce friction; dead centers are simpler but require lubrication.
- Cost: Live center set $100–$300; dead centers ~$50 each
- Rationale: Standard workholding for most jobs >4″ length.
Steady Rest & Follow Rest
Steady rest: Supports a long slender part during turning, preventing whip and chatter. Adjustable fingers grip the OD.
- Cost: $300–$800 depending on lathe size
- When essential: Parts >10–12″ long and <1″ diameter; eliminates vibration and allows aggressive feeds.
Follow rest: Mounted behind the cutting tool; supports the part immediately after the cut, preventing deflection and chatter.
- Cost: $200–$600
- When essential: Large-diameter threading or facing; heavy roughing cuts; extends tool life dramatically.
Toolholding & Cutting Tools
Toolpost styles:
- Fixed toolpost: Simple, low-cost ($50–$150); limited positioning flexibility.
- Rocker toolpost: Standard on many machines; tool position manually adjusted; quick and effective.
- Quick-change toolpost: Premium option ($200–$500); repeatable tool positions; faster changes; excellent for production.
Cutting tools & tool blanks:
- High-speed steel (HSS): Budget option ($3–$15 per tool); slower cutting speeds but forgiving and sharpenable. Still popular for hobby/educational use.
- Carbide inserts: Faster speeds, longer life, superior finish ($15–$40 per insert); requires higher rigidity and faster spindle speeds. Best for production.
- Parting tools: Specialized blades for cutting off parts; separate purchase ($15–$50).
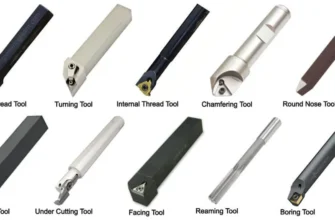
Tooling kit essentials: Right-hand turning tool, left-hand turning tool, facing tool, boring bar, threading tool, parting tool, knurling tool. Budget $200–$500 for a basic set; expandable as needed.
Measuring & Setup Tools
Dial indicator & indicator holder ($80–$200): For spindle runout checks, part centering, edge finding. Essential for precision work.
Micrometer set ($100–$250): Precision measurement to 0.001″. Standard for verifying part dimensions.
Calipers ($20–$50): Quick measurement; less accurate but fast for reference checks.
Indicator magnetic base ($30–$80): Holds dial indicators on lathe bed or carriage for alignment checks.
Safety & Workholding Essentials
Chuck key safety chain or magnetic chuck key holder ($10–$20): Prevents forgotten chuck keys from becoming projectiles. Essential safety item.
Safety glasses & face shield ($20–$50): Non-negotiable PPE.
Brush or chip wiper ($10–$30): Safely clears chips away from rotating work without hand contact.
Leather apron ($15–$40): Protects clothing from hot chips and oil.
Basic Maintenance & Tuning – Practical Checklist
Preventative maintenance dramatically extends machine life and keeps precision consistent.
Daily / Weekly Tasks (before and after each use)
Chip removal: Use a brush or chip scraper to clear chips from ways and bed. Never use compressed air (drives particles into bearings).
Spindle area: Inspect spindle nose and taper for debris; wipe clean with a dry cloth. Check that any mounted accessories (chuck, centers) are secure.
Oil ways & lead screw: Apply a thin coat of spindle oil or way oil to the bed ways and lead screw. Use a lint-free cloth or oil can with a flexible spout.
Motor & belt inspection: Visually confirm belt tension is firm (1/2″ deflection under thumb pressure). Check for fraying or cracks.
Check for debris: Remove any loose nuts, bolts, or foreign objects from the lathe before powering on.
Monthly / Quarterly Tasks (every 50–100 operating hours)
Spindle bearing preload check: Some machines have adjustable spindle bearings. If the spindle has slight vertical play (0.010–0.015″), tighten the bearing preload nut 1/4 turn and retest. Over-tightening generates heat and accelerates wear.
Spindle taper & chuck inspection: Remove the chuck and clean the taper and spindle nose with a clean cloth. Re-seat the chuck and verify secure engagement.
Backlash assessment: Mount a dial indicator on the toolpost and gently push the carriage by hand; measure rocking motion side-to-side. If >0.010″, inspect gibs (adjustable slides) and tighten if possible, or plan for gib replacement.
Feed rod & lead screw lubrication: Apply way oil to the feed rod and lead screw, working it in by hand-rotating the carriage. Wipe excess to prevent chip attraction.
Gearbox inspection: Listen to gearbox operation during a few speed changes; grinding or resistance indicates potential internal wear. Verify all speed/feed positions engage smoothly.
Motor bearings: Feel the motor housing briefly after a 10–15 minute run; it should be warm to the touch but not hot (>50°C). Excessive heat suggests bearing wear.
Semi-Annual / Annual Tasks (every 6–12 months)
Spindle alignment check: Mount a test bar in the chuck and use a dial indicator to measure runout at multiple points along the spindle. Record baseline (e.g., 0.002″ TIR). Increasing runout suggests bearing wear.
Bed parallelism & flatness check: Use a precision straightedge or an accurate test bar with dial indicator to verify bed ways remain parallel. Acceptable drift is ±0.002–0.003″ over 20″ for hobby machines; tighter tolerances for precision toolroom lathes.
Tailstock alignment: Use a test bar between centers and measure runout with a dial indicator. Tailstock offset >0.005″ requires adjustment (loose mounting bolts, wear in the tailstock bore). Many tailstocks have shims or adjustment screws for correction.
Motor bearings & pulleys: Inspect motor bearings (listen for grinding). Check that pulleys are secure and not cracked. Spin the motor by hand (with power off); it should rotate freely without resistance.
V-belt replacement (if needed): If belts are fraying, cracked, or slipping (loss of speed), replace as a pair. New belt cost ~$20–$50 per belt; easy installation saves $100+ in labor.
Electrical connections: Tighten terminal connections on the motor and control switch. Loose connections generate heat and can cause intermittent problems.
Calibration Tips: Spindle Runout & Tailstock Alignment
Checking spindle runout:
- Mount a test bar (precision ground shaft, ~1″ diameter) in the chuck.
- Clamp a dial indicator to the toolpost at the same height as the bar center.
- Rotate the spindle by hand; note the maximum and minimum dial readings.
- Runout = (max reading – min reading) / 2. Record for trend analysis.
- Acceptable runout: <0.001″ for precision work; <0.003″ for general work; <0.005″ for rough work.
Correcting tailstock offset:
- Place a live center or dead center in the tailstock.
- Mount a test bar between centers and lock the tailstock loosely in position.
- Rotate spindle by hand; use a dial indicator on the toolpost to measure runout of the center point.
- If off-center, loosen tailstock mounting bolts and tap the tailstock body (rubber mallet) to correct alignment.
- Re-check and tighten when satisfied.
Simple Upgrades That Improve Longevity & Performance
Variable frequency drive (VFD): Retrofit older lathes with electronic speed control ($1,500–$3,000 installed). Advantages: infinite speed adjustment, energy efficiency, reduced wear on belt-driven headstocks. Excellent ROI if running long hours.
Improved bearing cartridges: Swap out older roller bearings for premium SKF or Timken cartridges ($200–$400 per bearing). Extends spindle life by 50–100% if worn bearings are the issue.
Ways scraping service: Professional machinists can re-scrape worn ways, restoring precision ($2,000–$5,000). Worthwhile for valuable machines with heavy bed wear.
Lead screw conversion: Retrofit damaged lead screws with new ones ($500–$1,500). Restores smooth feed and threading capability.
Power feed retrofit: Add motorized longitudinal and cross-feeds to manual machines ($2,000–$5,000). Improves production speed and operator ergonomics.
Common Projects & Step-by-Step Examples
Project 1 (Easy): Lathe Mandrel for Bowl Finishing
Skill level: Beginner
Time: 30–45 minutes
Purpose: A mandrel is a tapered or stepped shaft that holds a wooden bowl blank for finishing the bottom without marring the interior. Useful for woodturners and craft workers.
Materials: 1.5″ diameter × 4″ long mild steel stock
Tools needed:
- 3-jaw chuck
- Parting tool
- Right-hand turning tool
- Calipers
- 60° live center (optional)
Steps:
- Secure the workpiece: Chuck the 1.5″ steel rod, leaving ~3″ extending. Tighten firmly.
- Face the end: Use the facing tool to create a flat surface. Move the cross-slide until the tool just touches, then feed perpendicular to the axis.
- Rough turn to 1.25″ diameter: Set spindle to ~400 RPM. Using the turning tool, make 0.05–0.10″ depth cuts, feeding along the axis. Work toward the chuck.
- Create the taper: Move the compound slide to a 5–10° angle. Make light cuts along the taper length (~2.5″) to create the mandrel profile. Test fit in a wooden bowl during cuts for fit verification.
- Finish & polish: Reduce depth of cut to 0.025″ for the final pass. Use fine abrasive cloth to smooth; apply a light oil finish if desired.
- Part off: Use the parting tool to separate the mandrel. Leave a small stub for safe handling.
Result: A custom mandrel sized to fit your specific bowl blank. Reusable; easily refined if needed.
Project 2 (Intermediate): Threaded Shaft with Shoulder
Skill level: Intermediate
Time: 1.5–2 hours
Purpose: Common part in mechanical assemblies; teaches spindle speed selection, threading, and precision measurement.
Materials: 0.75″ diameter × 3″ long steel bar stock (SAE 1018 or similar)
Specs (target dimensions):
- 0.75″ diameter × 1.25″ long (bearing fit section)
- 0.50″ diameter × 1.5″ long, threaded 3/8-16 UNC
- 0.125″ shoulder fillet (transition)
Tools needed:
- 3-jaw chuck
- Parting tool
- Right-hand turning tool
- Threading tool & cutting compound
- Micrometer or calipers
- Live center (optional)
Steps:
- Setup: Chuck the blank with ~2.75″ extending. Install a live center in the tailstock for support.
- Face & measure: Face the end square. Measure and mark the transition point (~1.25″ from chuck).
- Rough turn the shoulder: Set spindle to 600 RPM. Turn down to 0.55″ diameter over the marked length, leaving ~0.05″ stock for finishing.
- Finish turn to final dimension: Reduce spindle to 400 RPM; make a 0.025″ finishing cut to achieve 0.500″ diameter. Measure with micrometer; target ±0.005″.
- Cut the shoulder: Move the compound slide perpendicular and make a shallow cut to create the shoulder transition. Radius is optional (improves stress concentration but adds complexity).
- Thread the shaft: Set spindle to 200 RPM (conservative speed for 3/8-16). Engage the lead screw using the thread lever. Take 0.050–0.080″ depth cuts, backing out after each pass. Apply cutting compound liberally. Continue until thread reaches full depth (~4–6 passes).
- Verify thread fit: Stop the lathe, remove the piece, and test a 3/8-16 nut. Should thread smoothly; if tight, make a light finishing cut.
- Part off or leave as-is: If the application requires parting, use the parting tool; otherwise, stop with the tailstock live center in place for safety.
Result: A precision threaded shaft; replicable for production runs of similar parts.
Project 3 (Advanced): Precision Bushing with Close Tolerance
Skill level: Advanced
Time: 2.5–3.5 hours
Purpose: Bushings are precision cylindrical components; this teaches tight tolerance machining, boring, and measurement discipline.
Materials: 1.5″ OD × 0.75″ ID × 1.25″ long aluminum stock (or steel if more challenge desired)
Target specs:
- 1.500″ OD (±0.0005″)
- 0.7505″ ID (±0.0005″, Class H7 fit for typical shaft)
- 1.250″ length (±0.010″)
Tools needed:
- 4-jaw chuck (for centering precision)
- Facing tool
- Right-hand turning tool
- Boring bar with carbide insert
- Dial indicator & indicator holder
- Micrometer (0.0001″ resolution)
- Depth micrometer (for final ID check)
- Center drill
Steps:
- Centering in 4-jaw chuck: Mount the blank and use a dial indicator to center it within 0.0005″. This is critical for precision boring.
- Face both ends: Face one end true; measure thickness. Turn around and face the other end to final length.
- Check runout: With the part mounted, verify spindle runout is <0.001″ TIR at the center bore.
- Drill center hole: Use a center drill to start an axial hole; this guides the boring bar.
- Rough boring: Mount a boring bar with a carbide insert. Set spindle to 800–1,000 RPM. Make 0.050–0.080″ depth cuts, feeding carefully toward the bore centerline. After each pass, measure with a dial caliper (preliminary).
- Finish boring: Reduce spindle to 400 RPM for the final pass. Target 0.751″ diameter. Measure with a depth micrometer or bore gauge. Boring bars deflect slightly under feed pressure; account for this by stopping slightly proud of final dimension, then making a light 0.005″ finishing pass.
- Final ID check: Use a precision bore gauge or micrometer. Target 0.7505″ ±0.0005″.
- OD verification: Check the outer diameter with a micrometer at the mid-point and near both ends. Target 1.500″ ±0.0005″.
- Part-off or profile: If the application calls for faced ends or a chamfer, make those cuts. Otherwise, part off cleanly.
Result: A precision cylindrical bushing suitable for mechanical assemblies; represents intermediate manufacturing skill.
Safety Best Practices
Operating an engine lathe safely requires respect, focus, and adherence to consistent procedures. Accidents are often preventable.
Personal Protective Equipment (PPE)
- Safety glasses: Always. Chips and particles can cause eye injury.
- Face shield: Recommended for heavy roughing or interrupted cuts where chip ejection is unpredictable.
- Hearing protection: Lathe operation generates 85–90 dB; use earplugs or earmuffs for extended sessions (>1 hour).
- Closed-toe shoes: Protect feet from dropped tools or hot chips.
- Loose clothing warning: Never wear loose sleeves, scarves, or jewelry. Long hair should be secured or covered.
- Leather apron: Protects clothing and skin from hot chips and oil.
Guarding & Work Habits
- Belt & pulley guards: Keep headstock guards in place during operation. Never reach near spinning belts.
- Spindle nose: Keep the chuck key removed after every use; tie it to the lathe with a safety cable if the key is frequently forgotten.
- Rotate the spindle by hand before powering on to verify clearance (no unexpected obstructions).
- Start slowly: Begin low-speed operation when starting a new workpiece; listen and watch for vibration before increasing RPM.
- Never leave a spinning lathe unattended: Always stop and lock out before stepping away.
Chip Management
- Never reach for chips while the spindle is running: Hot, sharp chips can cause lacerations. Stop the lathe first.
- Use a chip brush or scraper to clear chips safely.
- Long, stringy chips: Can wrap around the work or spindle. If you notice this forming, reduce feed or increase speed slightly to break the chip into smaller fragments.
Workholding Safety
- Chuck mounting: Verify the chuck is tight and concentric before spinning. A loose chuck can become a projectile.
- Chuck key removal: Remove and stow the chuck key immediately after each use. A spinning chuck key can cause serious injury.
- Tail support for long parts: Always use the tailstock center for work >6″ extending from the chuck; reduces vibration and deflection that can cause loss of control.
- Test the setup at low speed: Before making critical cuts, spin the assembly at 50–100 RPM to verify stability.
Speed & Feed Guidelines for Safety
| Material | Diameter | Recommended SFM | Typical RPM (on 10″ lathe) |
|---|---|---|---|
| Aluminum | 0.5–2″ | 150–250 | 1,000–2,500 |
| Aluminum | 2–4″ | 100–150 | 600–1,200 |
| Mild steel | 0.5–2″ | 60–100 | 400–800 |
| Mild steel | 2–4″ | 40–60 | 250–450 |
| Threading (any) | Any | 20–40 | 150–300 |
| Facing (initial) | Any | 30–50 | 200–400 |
Key principle: Higher speeds require lower material removal rates (lighter feeds). If the lathe vibrates excessively, reduce speed or feed immediately.
Emergency Procedures
- Power cutoff: Know the location of the emergency stop button or main power switch. Practice reaching it without looking.
- If clothing catches: Do not panic. Stop the spindle using the emergency stop. Do not attempt to back out the workpiece; let the machine stop first.
- If a tool flies loose: Stop immediately. Inspect the workpiece, chuck, and tailstock for damage before restarting.
- If the workpiece begins to vibrate wildly: Stop the lathe. Reduce speed, feed, or reposition the tailstock. Never attempt to correct vibration while spinning.
Frequently Asked Questions (FAQ)
Q1: What is the difference between an engine lathe and a CNC lathe?
An engine lathe is manually operated; the machinist controls all movements via hand wheels and levers, responding in real-time to feedback. A CNC lathe is computer-controlled; the operator writes or loads a program, then monitors the automatic execution. Engine lathes excel at one-off jobs, quick adjustments, and teaching – they build intuition and adaptability. CNC lathes dominate high-volume production, complex programs, and unattended operation. For a small shop or hobbyist, an engine lathe offers flexibility and lower capital cost. For a contract manufacturer producing 1,000 identical parts monthly, CNC is economical.
Q2: How much horsepower do I need for steel vs. aluminum?
Aluminum removes easily; 0.5–1 HP suffices for hobby-scale aluminum work (small diameters, light feeds). Steel demands more power due to higher cutting forces. A 10″ manual lathe with 1.5 HP handles light steel work comfortably. If you’re doing heavy roughing of large-diameter steel (e.g., 4″ diameter shafts), 3–5 HP is more appropriate. General rule: multiply your required motor power by 1.5–2 as a safety margin to avoid stalling under load.
Q3: Can I thread metric and imperial on the same lathe?
Yes, if the lathe has a metric/imperial gearbox or a comprehensive change-gear set. Most American-made lathes (Southbend, Logan, Clausing) can switch between metric and imperial via gear change or gearbox lever. Verify the machine’s documentation for available thread pitches (imperial: TPI, metric: mm pitch). Some budget machines are limited to imperial only; check before purchase if metric threading is essential.
Q4: Is a used lathe a good buy?
Absolutely, if you inspect carefully and budget for refurbishment. Many decades-old American and European lathes (Southbend 10L, Clausing, Hardinge) are still producing excellent work because they were built to last. A $3,000–$5,000 used lathe in fair condition often outperforms a $2,000 new benchtop model. The trade-off: you may invest $2,000–$5,000 in bearing replacement, way scraping, or spindle refurbishment to bring a neglected machine back to precision. Factor the total cost before deciding.
Q5: How do I choose between a gap-bed and a standard-bed lathe?
A gap-bed lathes allows larger diameter workpieces to be mounted at the headstock or faceplate because a removable section of bed can be lifted out. Use a gap-bed if your primary work involves large-diameter facing (e.g., 18″+ diameter flanges on a 12″ swing lathe). Standard-bed lathes are more rigid over the full length and simpler to operate; choose standard if you work predominantly with long parts or need maximum rigidity. Most small shops and hobbyists find standard beds sufficient; gap-beds add complexity without proportional benefit for typical job-shop work.
Q6: How often should I replace lathe belts and bearings?
V-belts typically last 3–5 years of regular use (depending on load and humidity). Replace if fraying, cracking, or slipping (loss of spindle speed). Spindle bearings last much longer (10–20+ years) if properly lubricated and not subjected to heavy shock loads. Many lathes operate for decades on original bearings. Monitor spindle noise and runout annually; if you notice grinding or increasing runout (>0.002″ change from baseline), bearing replacement is justified ($1,500–$3,000 professionally done; $500–$1,000 in parts if you DIY).
Q7: What’s the difference between 3-jaw and 4-jaw chucks?
A 3-jaw chuck auto-centers the workpiece when tightened, making quick setups possible. However, it’s less precise and can’t hold square or irregular workpieces. A 4-jaw chuck has independent jaws; you manually position each jaw, allowing precise centering, holding of non-round stock, and eccentric workpieces. Trade-off: 4-jaw requires more setup time but offers flexibility. Many shops keep both: 3-jaw for production setups, 4-jaw for custom or precision work.
Q8: Can I upgrade an old manual lathe with a VFD or power feed?
Yes. A variable frequency drive (VFD) retrofit replaces the mechanical belt-drive headstock with electronic speed control, allowing infinite RPM adjustment without stopping. Cost: $1,500–$3,000 installed. Power feed retrofit adds motorized longitudinal and cross-feeds, improving production speed and operator ergonomics. Cost: $2,000–$5,000 depending on machine size. Both upgrades extend machine life and improve productivity, making them worthwhile if you plan to use the lathe heavily.
Q9: What does spindle runout mean, and why does it matter?
Spindle runout is the wobble or eccentricity of the spindle as it rotates, measured in thousandths of an inch (TIR = total indicated runout). If a spindle has 0.005″ TIR, the cutting tool will vibrate ±0.0025″ around the intended centerline, causing surface finish defects and chatter. For hobby work, <0.003″ TIR is acceptable. For precision work, <0.001″ TIR is desirable. Measure runout by mounting a dial indicator on a stable support and recording deflection of a test bar as the spindle rotates. Excessive runout suggests worn bearings or misalignment.
Q10: What is the difference between a production lathe and a hobby lathe?
A production (industrial) lathe prioritizes speed and duty cycle: power feeds allow rapid part completion, rigid casting accommodates aggressive feeds, three-phase motors deliver consistent power, and mechanical gearboxes offer fast changeovers. A hobby lathe prioritizes cost and versatility: manual feeds keep the machine simple, moderate horsepower suffices for varied materials, and single-phase power suits home workshops. The true difference emerges over thousands of operating hours: an industrial lathe maintains precision and reliability under continuous production; a hobby lathe is designed for periodic use and accepts higher operator attention. Mismatching (e.g., running a hobby lathe 16 hours/day) leads to premature wear and safety risk.
Conclusion & Next Steps
Engine lathes remain indispensable for anyone serious about metalworking, restoration, or precision manufacturing. Their versatility, durability, and tactile feedback make them irreplaceable for learning and creative problem-solving. Whether you’re selecting your first machine, upgrading a shop, or restoring a vintage lathe, the framework in this guide – understanding specs, evaluating used machines, budgeting for refurbishment, and committing to maintenance – will guide you toward a sound investment and years of reliable service.
Decision recap:
- Hobby/learning: Start with a benchtop mini (Grizzly G0619, $2,000–$2,500) or a used Southbend 9/10 ($4,000–$8,000).
- Small shop: Invest in a 10–12″ center lathe with 1.5–2 HP and metric/imperial capability ($6,000–$15,000).
- Production/heavy work: Budget for an industrial 16″+ lathe with power feeds and three-phase capability ($15,000–$50,000).
We encourage you to share your application and budget in the comments below – readers and the community often provide targeted recommendations based on real-world experience in your specific niche. Subscribe to our blog for model reviews, maintenance deep-dives, and project tutorials. Your next precision part begins with the right machine in your hands.